

Setting up a WordPress site on Amazon EC2 is easy. In fact, you could use this method to get your WordPress blog set up in minutes! It’s even free of charge if you have an AWS account and a credit card. Let’s learn how to set this up and make sure that it works for you!
AWS Access and Basics:
AWS (Amazon Web Services) is a collection of online services that can be used to build, run and manage applications. EC2 is the name for Amazon’s computing infrastructure as a service, including virtual machines (VMs), storage services, networking, and monitoring tools. You can use them to set up your own website or blog easily using the Bitvise SSH Client.
Create an EC2 instance on AWS
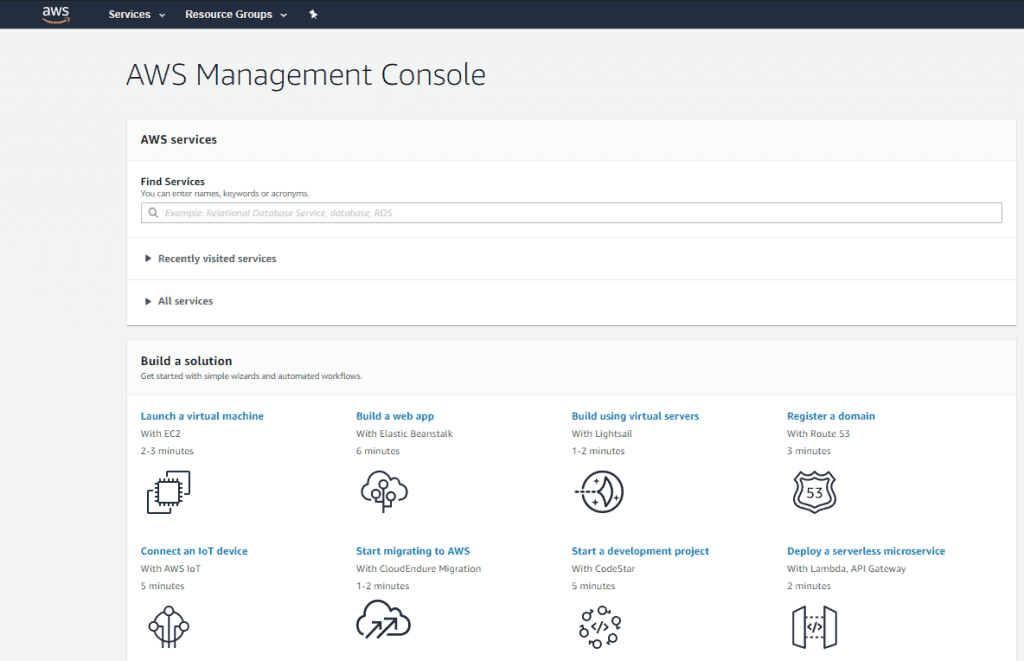
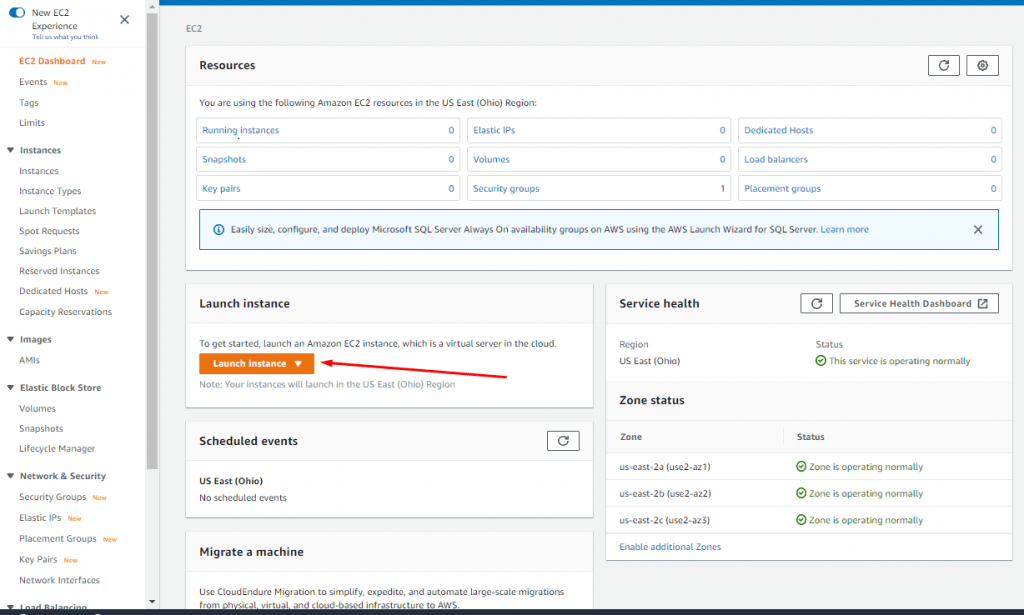
When you access the AWS console, you will see this dashboard.
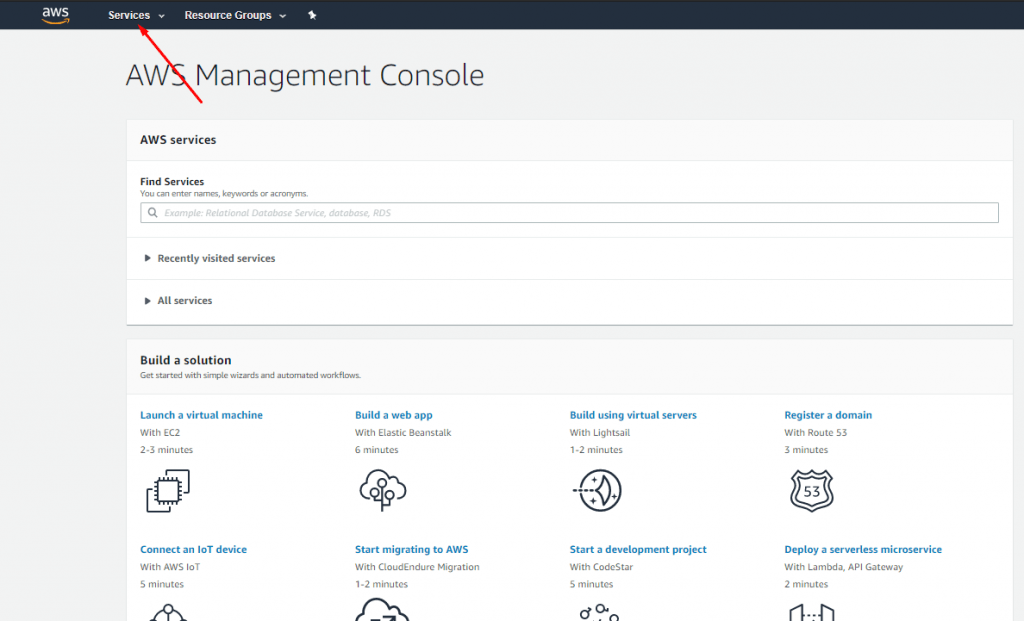
Select Services from the top menu.
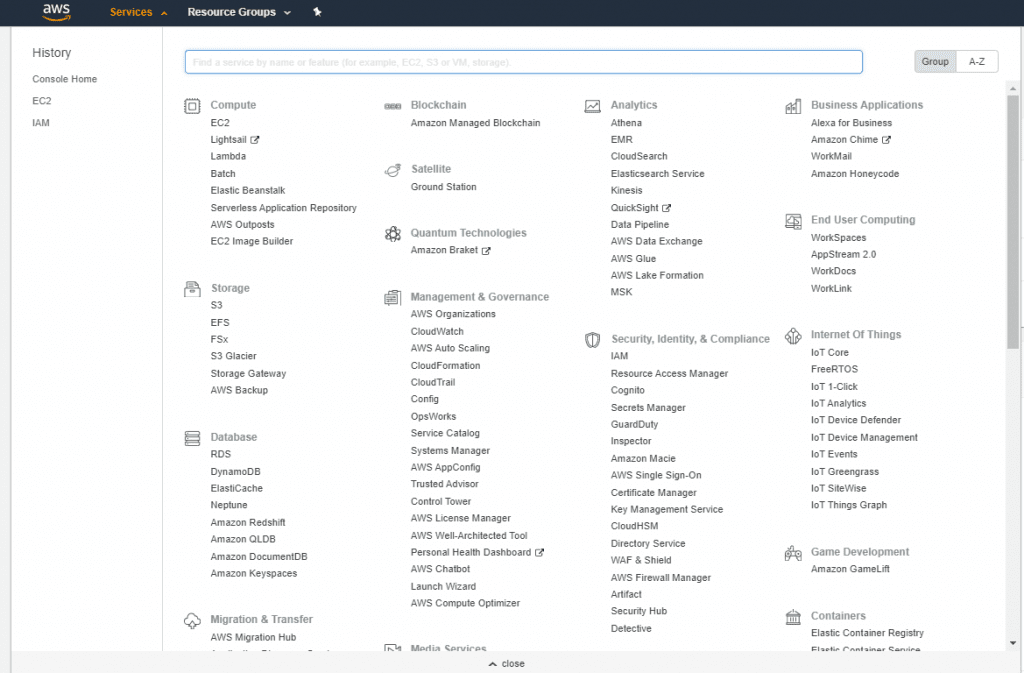
Here is the screen you see if you click on the Services link.
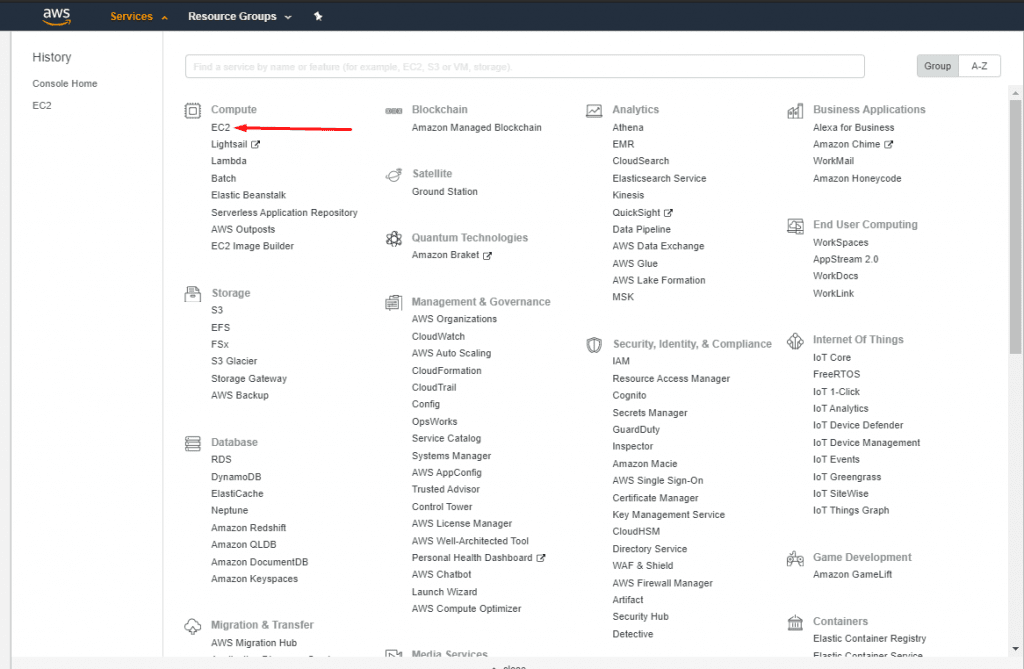
EC2 Setup with Centos 8 minimal
The EC2 option will appear on your screen. Click it to begin.
From here you can create an EC2 instance with Centos 8 as OS. The next step is to click the Launch Now option.
Choose AMI
Select an Amazon Machine Image (AMI). The operating system image for this instance must be selected here.
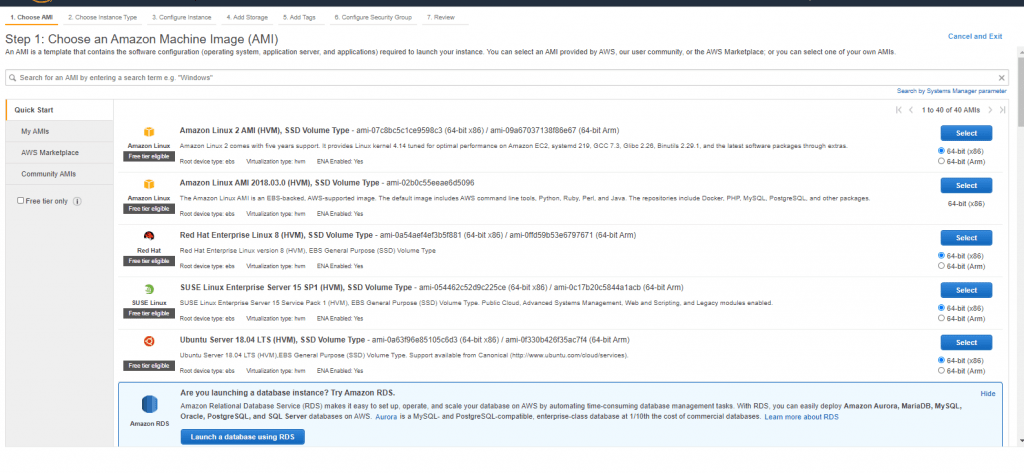
Click on the AWS Marketplace option on the screen above.
Here you have to search for Centos. (If you want to install another operating system, make sure it’s supported by CyberPanel).
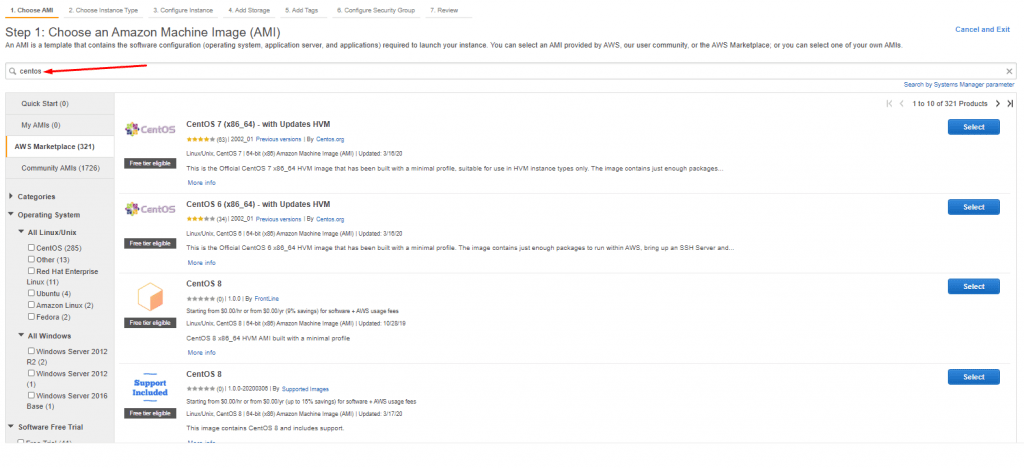
We choose CentOS 8 Minimal (CentOS 8.2.2004).
To set up the instance, click on the Select button.

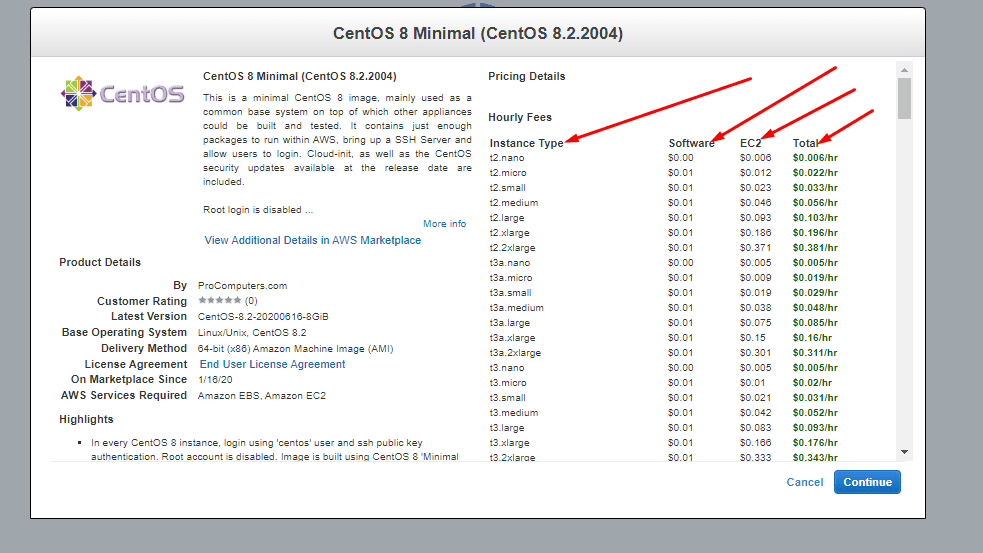
You will see a Pricing Page after selecting the operating system. This is just a description of how much you will be charged based on the size of the instance you choose.
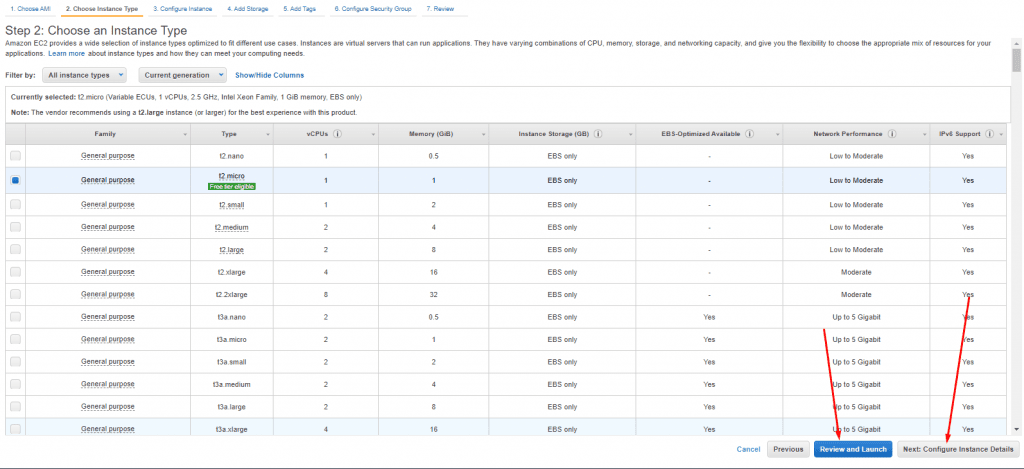
Choose Instance Type
In this step, you must choose the instance size. And click for the next step. My choice is a general with a free trial.
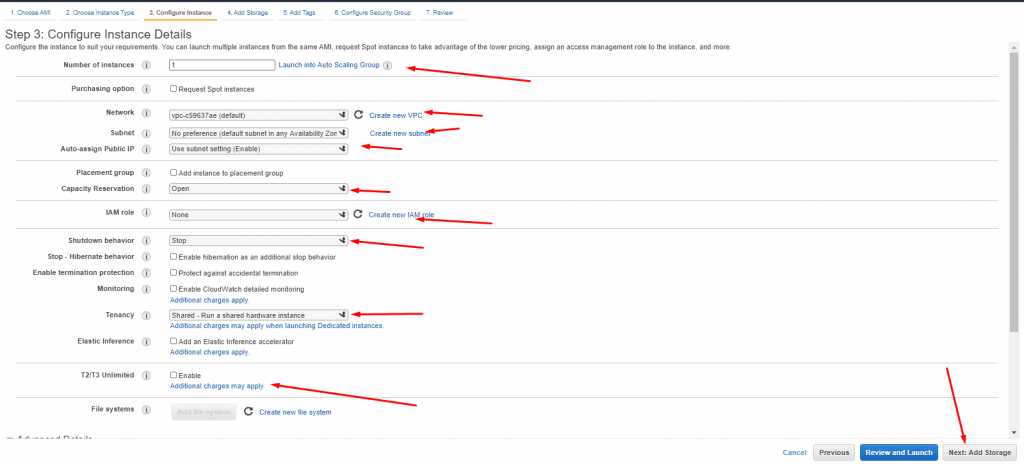
Configure Instance
Leave the settings as default; if you wish to change anything, do so according to your requirements. If you don’t want to change anything then leave this as default and process to next.
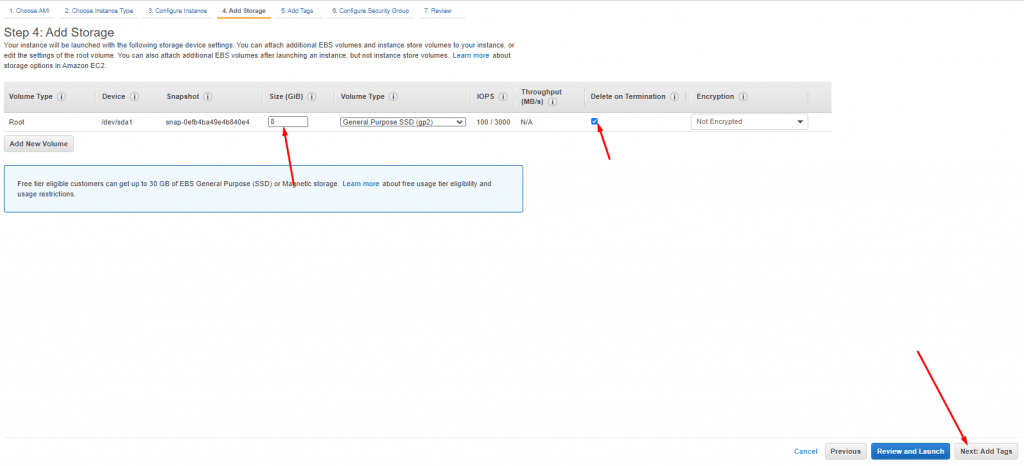
Add Storage
You can add or change the storage according to your needs. Processed to the next after changes.
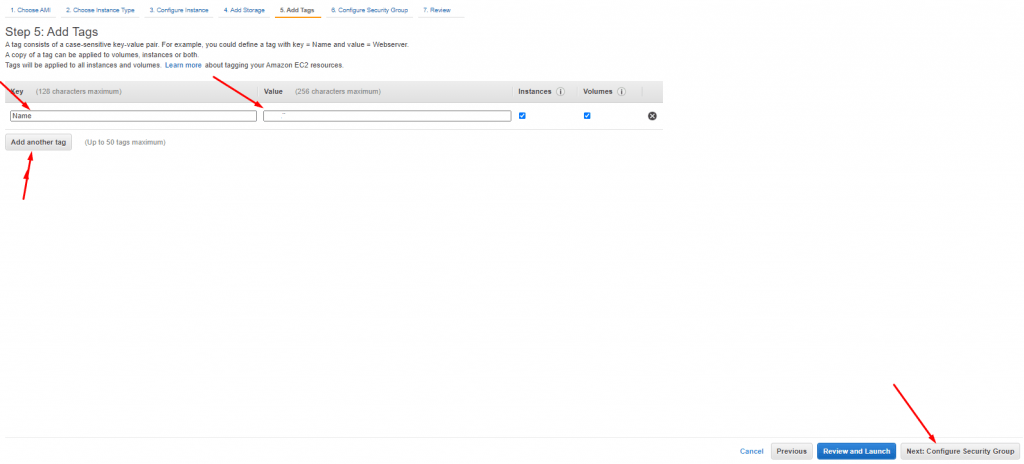
Add Tags
In this step, you can add any tags you want. Like name, title, etc.
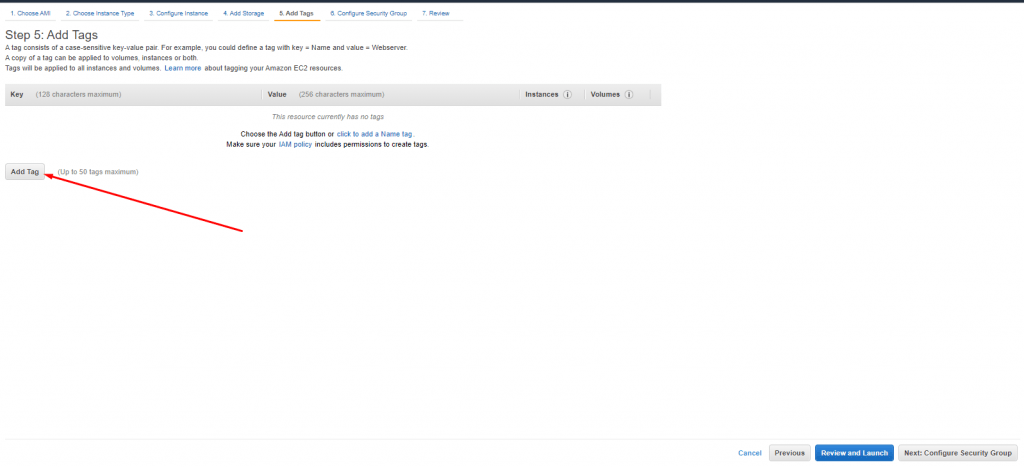
Add the information like this:
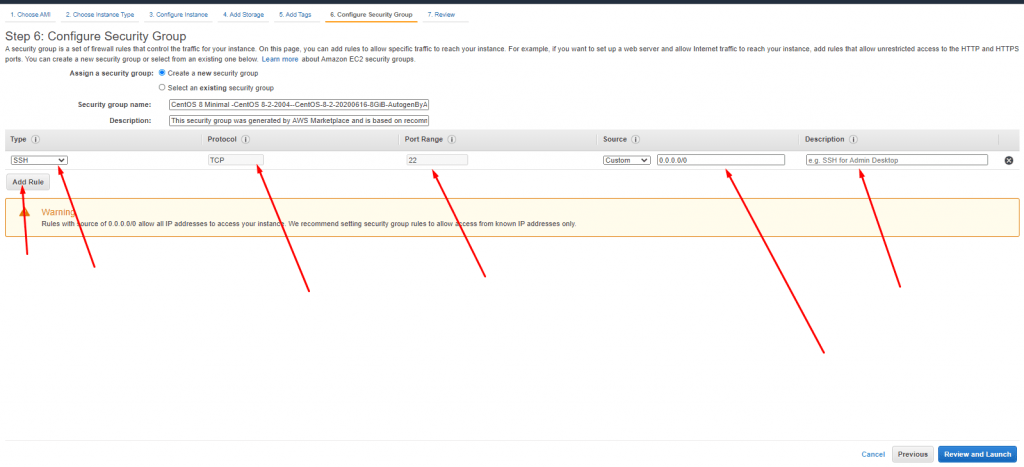
Configure Security Group
This is the most important part of this process. If you do not add all CyberPanel ports before installing CyberPanel, some features of CyberPanel may not work.
There is only one port in the default configuration which looks like this:
Add all the ports as seen in the picture below
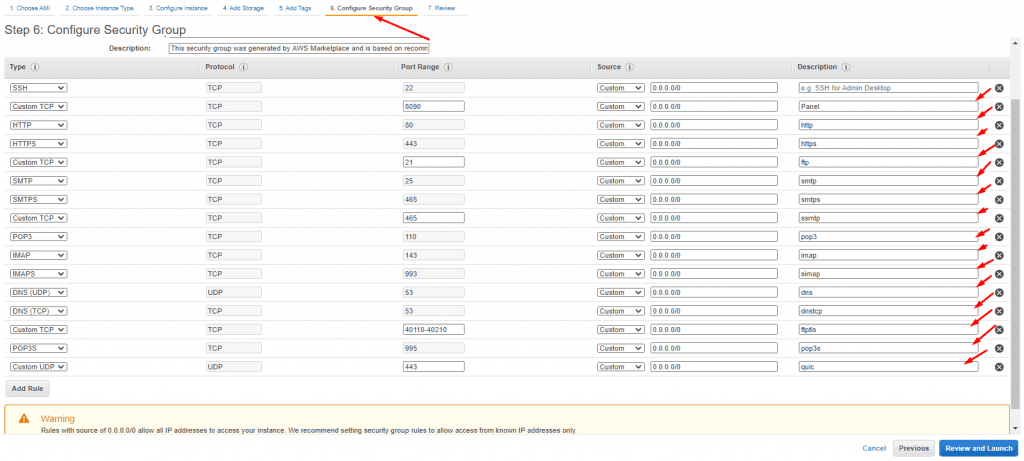
Add IP as 0.0.0.0/0,::/0
There are some ports that need to be opened for CyberPanel to work properly (in the IP Address section, you may want to replace 0.0.0.0/0 with your IP in order to better protect your server from attacks):
| ID | Name | Protocol | IP Address | Port |
|---|---|---|---|---|
| 1 | panel | tcp | 0.0.0.0/0 | 8090 |
| 2 | http | tcp | 0.0.0.0/0 | 80 |
| 3 | https | tcp | 0.0.0.0/0 | 443 |
| 4 | ftp | tcp | 0.0.0.0/0 | 21 |
| 5 | smtp | tcp | 0.0.0.0/0 | 25 |
| 6 | smtps | tcp | 0.0.0.0/0 | 587 |
| 7 | ssmtp | tcp | 0.0.0.0/0 | 465 |
| 8 | pop3 | tcp | 0.0.0.0/0 | 110 |
| 9 | imap | tcp | 0.0.0.0/0 | 143 |
| 10 | simap | tcp | 0.0.0.0/0 | 993 |
| 11 | dns | udp | 0.0.0.0/0 | 53 |
| 12 | dnstcp | tcp | 0.0.0.0/0 | 53 |
| 13 | ftptls | tcp | 0.0.0.0/0 | 40110-40210 |
| 14 | POP3S | tcp | 0.0.0.0/0 | 995 |
| 15 | quic | udp | 0.0.0.0/0 | 443 |
| 16 | terminal | tcp | 0.0.0.0/0 | 5678 |
| 17 | lsws | tcp | 0.0.0.0/0 | 7080 |
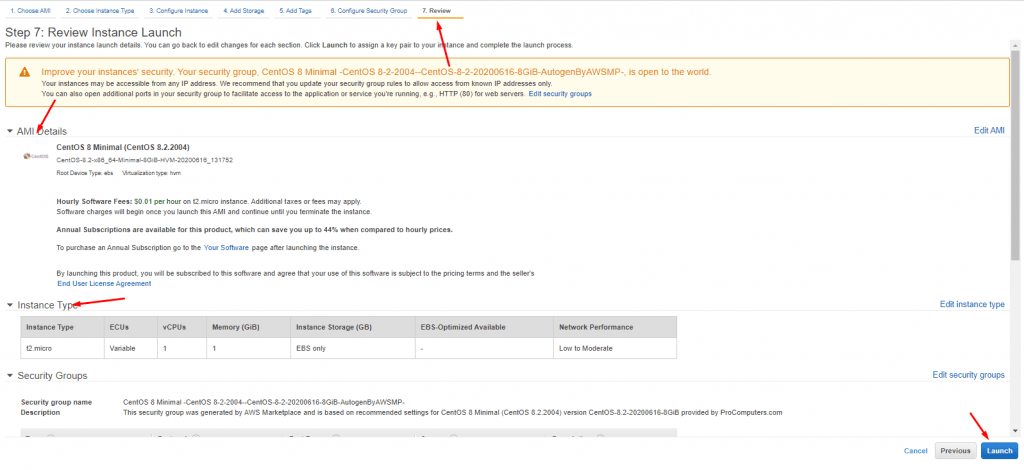
Review
In the final step of the EC2 setup, review all the information you added previously.
Access Key Setup:
In order to install CyberPanel, you need to create a key pair to access the server. Otherwise, you will not be able to enter SSH. You can upload an existing key as well but we will create and download a new key.
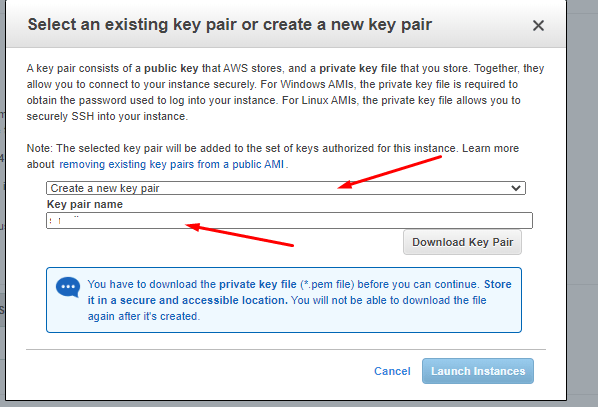
Download this Key Pair in your local computer, so that we can use it later to access this instance.
Use this key and Launch this instance.
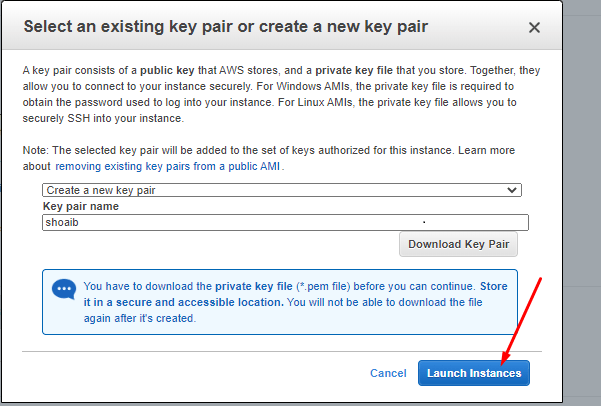
The Amazon EC2 will set-up your instance in a few seconds and it will be ready to use.
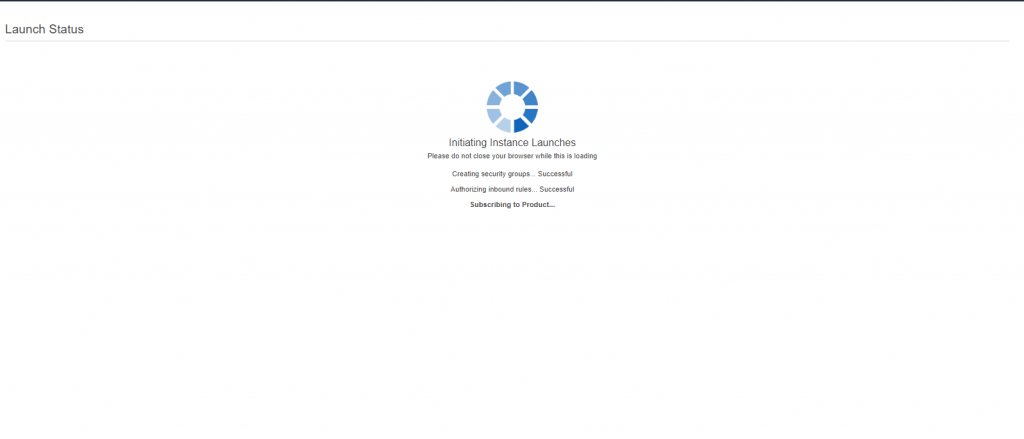
After completion of this process, you can check your instances. All the information about your instances can be found under Services-> EC2 -> Instances.

Access server using Bitvise:
Once all is done for the EC2 setup. It’s time to access the server and install CyberPanel.For this article, we will use Bitvise to access our server.
If you don’t have Bitvise installed on your computer download it from here.
After downloading provide your IP address for the Host field, Username will be centos(The default username is centos). Port 22. You should set the initial methods to a public key and the client key to auto.
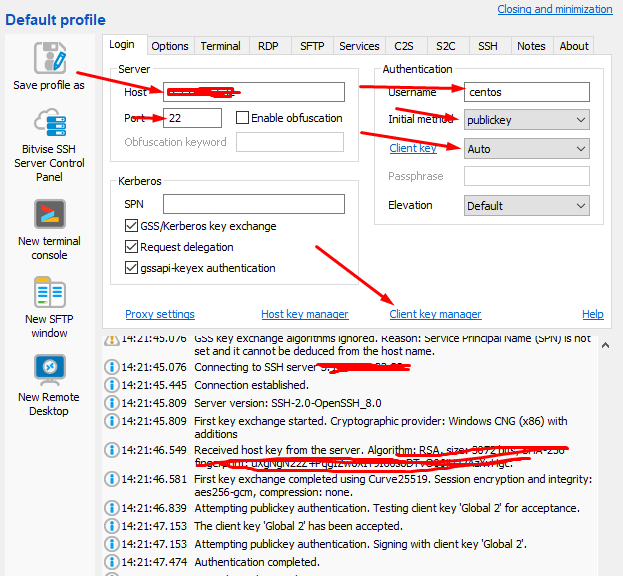
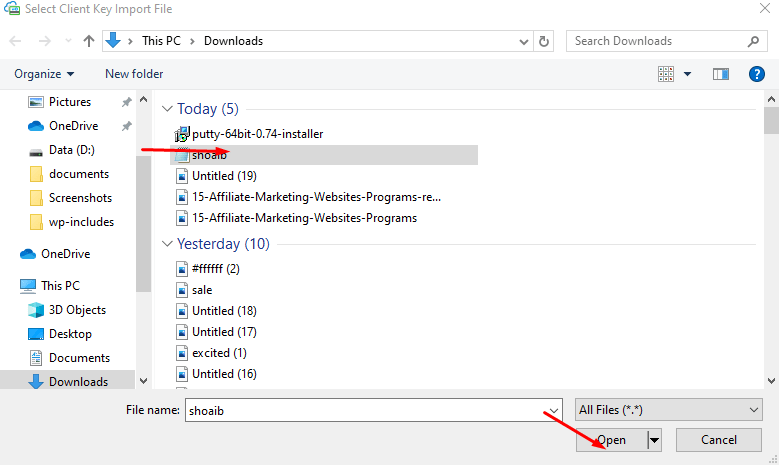
To grant access to your key click on the Client key manager. Click on the import option on the next screen.
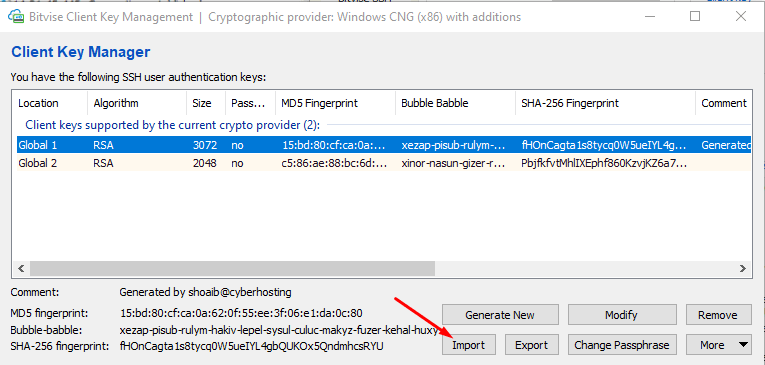
Select your key file and I will appear on the Client Key Manager.
Once you have logged in, you will be able to access the server.
Install CyberPanel:
Once the terminal was launched.
Follow this guide to install CyberPanel.
Set up WordPress on CyberPanel
The main dashboard of CyberPanel is straightforward. Because the panel is prominent, you can easily access the pre-installed features. There is a menu bar on the left side of your screen. Open the following window by clicking on Websites -> Create Website
Provide the following information:
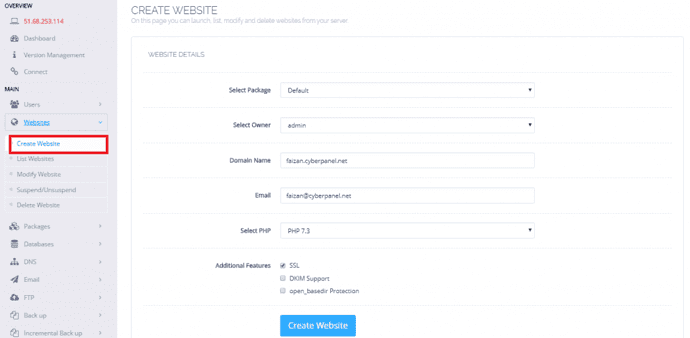
- Set Select Package to Default.
- Set Select Owner to admin. You can later add other users who should also be able to manage your site.
- Set the Domain Name to the domain where you want to install WordPress.
- Set Email to your website’s email address. You can make one for official use with one click from the CyberPanel email system.
- Set Select PHP to the latest version. You can choose between PHP 5.6 and PHP 7.3 with CyberPanel.
- Additionally, you can access additional website features with just a click. SSL (Secure Socket Layer), DKIM Support, and Open_basedir Protection are your choices.
- Click Create Website.
The website faizan.cyberpanel.net 1 is now successfully created. The next step is to install WordPress on CyberPanel. You will find your site listed under Websites -> List Websites. You will find the manage option on the right side of your screen. To edit your website, click it.
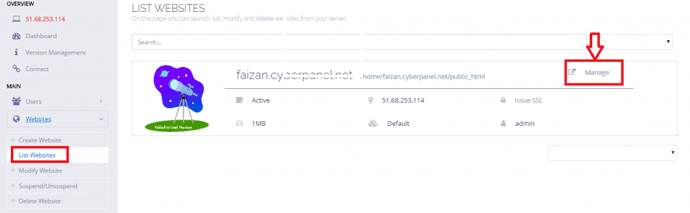
It will take you to the following screen. You will find WordPress + LSCache under pre-installed applications.
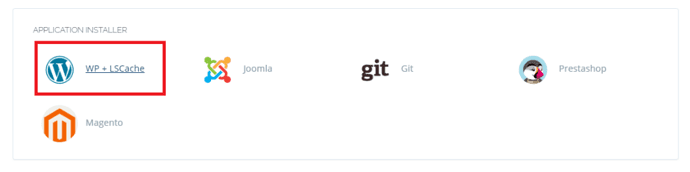
Install WordPress and LSCache by clicking WP + LSCache.Your WordPress site will load faster with the LSCache plugin. Because it is installed at the server level, it differs from other cache plugins.
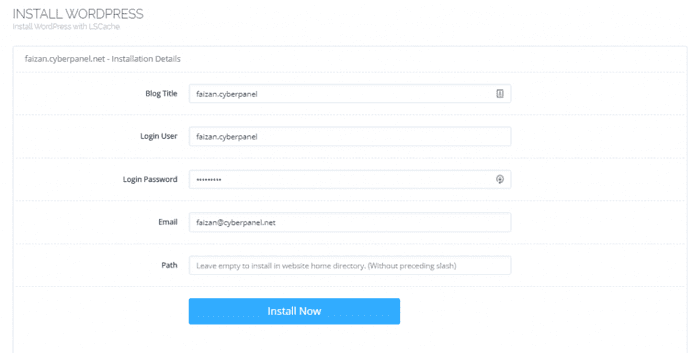
- Your WordPress site’s title should be set as the Blog Title.
- The Login User should be set to the username of the site administrator.
- For blog authentication, set Email to an email address.
- Make sure your blog’s Login Password is a strong one.
- For blog authentication, set Email to an email address.
- Press the Install Now button.
WordPress is now successfully installed. To log into your WordPress website’s main dashboard, navigate to http://domain-name/wp-login.php/ and enter your username and password:

Conclusion
To recap, you can use the Amazon Web Services (AWS) EC2 service to run a WordPress web server. If you already have some experience with Linux and AWS, this tutorial will get you up and running in no time!


