Switching from Android to iPhone is an exciting step, but transferring your precious photos from Google Photos to iCloud can feel overwhelming. With so many memories stored in digital form, the last thing you want is to lose them during the switch. Fortunately, transferring photos from Google to Apple is easier than it seems, and this guide will walk you through every step of the process.
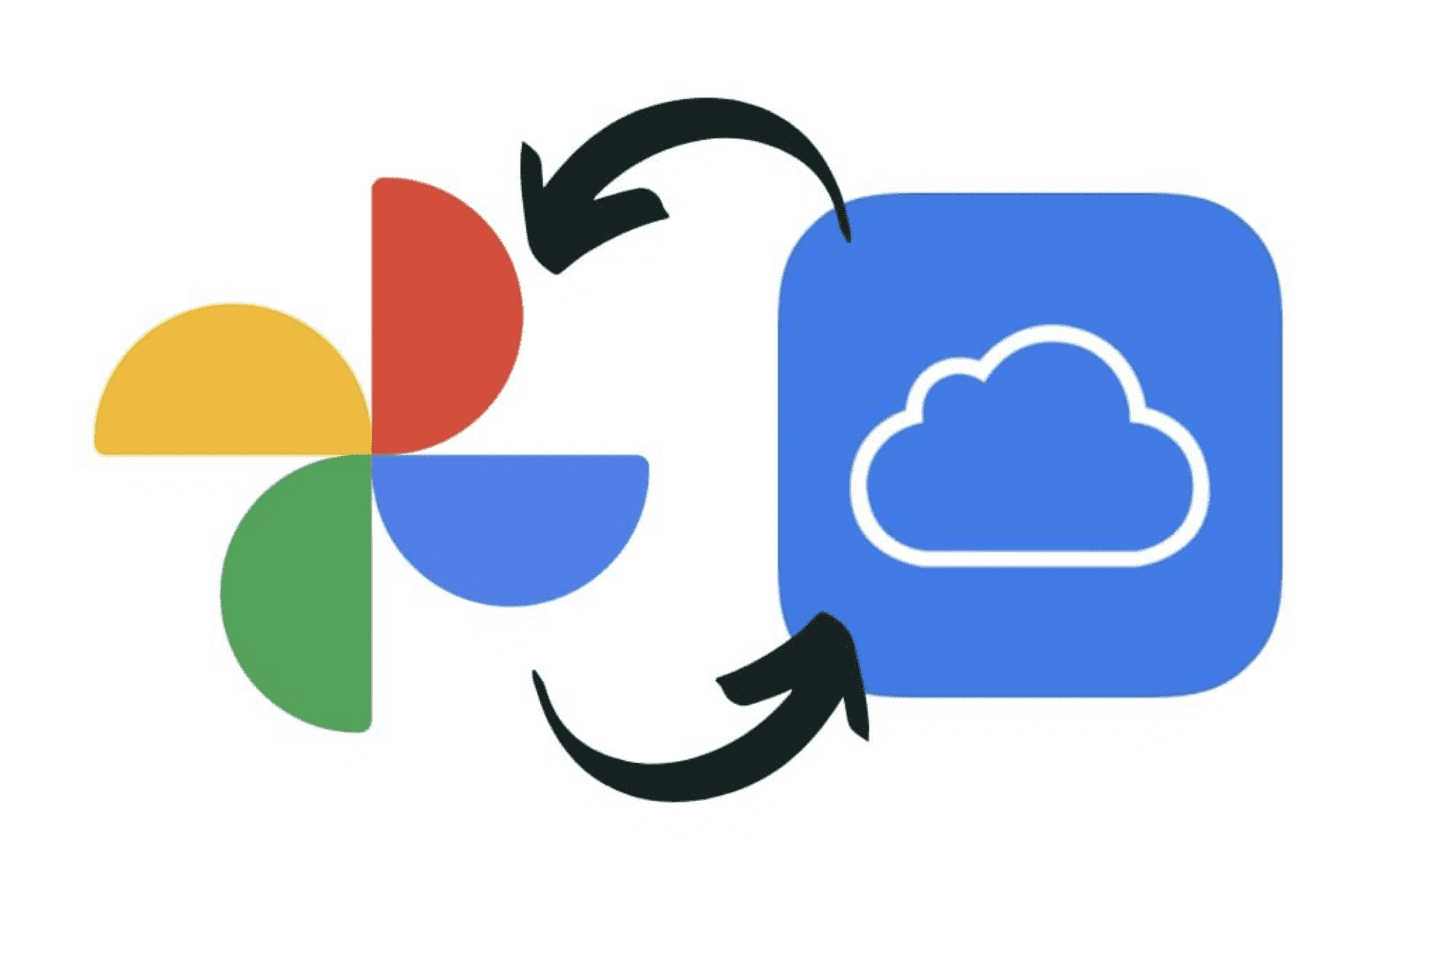
Whether you’re a tech expert or new to managing your digital content, we’ve got you covered. By the end of this article, you’ll know exactly how to move your photos from Google Photos to iCloud, keeping your memories safe and easily accessible on your new Apple device. We’ll explore multiple methods to ensure you find the one that suits your needs, so let’s get started.
Understanding the Transfer Process
Why Transfer Photos from Google to Apple?
If you’ve recently made the switch from an Android device to an iPhone, transferring your photos from Google to Apple is an essential step to ensure continuity in how you manage and access your media. Google Photos is a popular choice for Android users because it offers seamless integration with Google services and provides a straightforward way to back up and store photos. However, once you switch to an iPhone, the benefits of having your photos within the Apple ecosystem become clear.
By transferring your photos to iCloud, you can access your pictures across all your Apple devices, including your iPhone, iPad, Mac, and Apple TV. This integration not only simplifies photo management but also ensures that your photos are securely backed up in iCloud, which is tightly integrated with Apple’s security features. Moreover, having all your media in one place enhances your overall user experience, allowing you to enjoy Apple’s features like Memories, Shared Albums, and advanced photo editing tools without any limitations.
What You Need Before You Begin
Before diving into the process of transferring photos from Google to Apple, it’s essential to prepare.
First, ensure you have a Google Photos account with all your images backed up. You’ll also need an active iCloud account with sufficient storage space to accommodate all your photos. Apple provides 5GB of free iCloud storage, but if your photo library is extensive, you might need to upgrade to a larger plan.

Additionally, a stable internet connection is crucial for a smooth transfer process. Transferring a large number of photos, especially in high resolution, can consume significant bandwidth, so make sure you’re connected to a reliable Wi-Fi network to avoid any interruptions.
Step-by-Step Guide to Transferring Your Photos
Method 1: Using iCloud and Google Takeout
For those with many photos or who prefer managing their media on a computer, using Google Takeout alongside iCloud is a robust method. Here’s how:
Export Photos Using Google Takeout: Google Takeout is a service that allows you to download a complete copy of your Google data, including photos. Visit the Google Takeout website and sign in with your Google account.
Select “Google Photos” as the data you want to export.
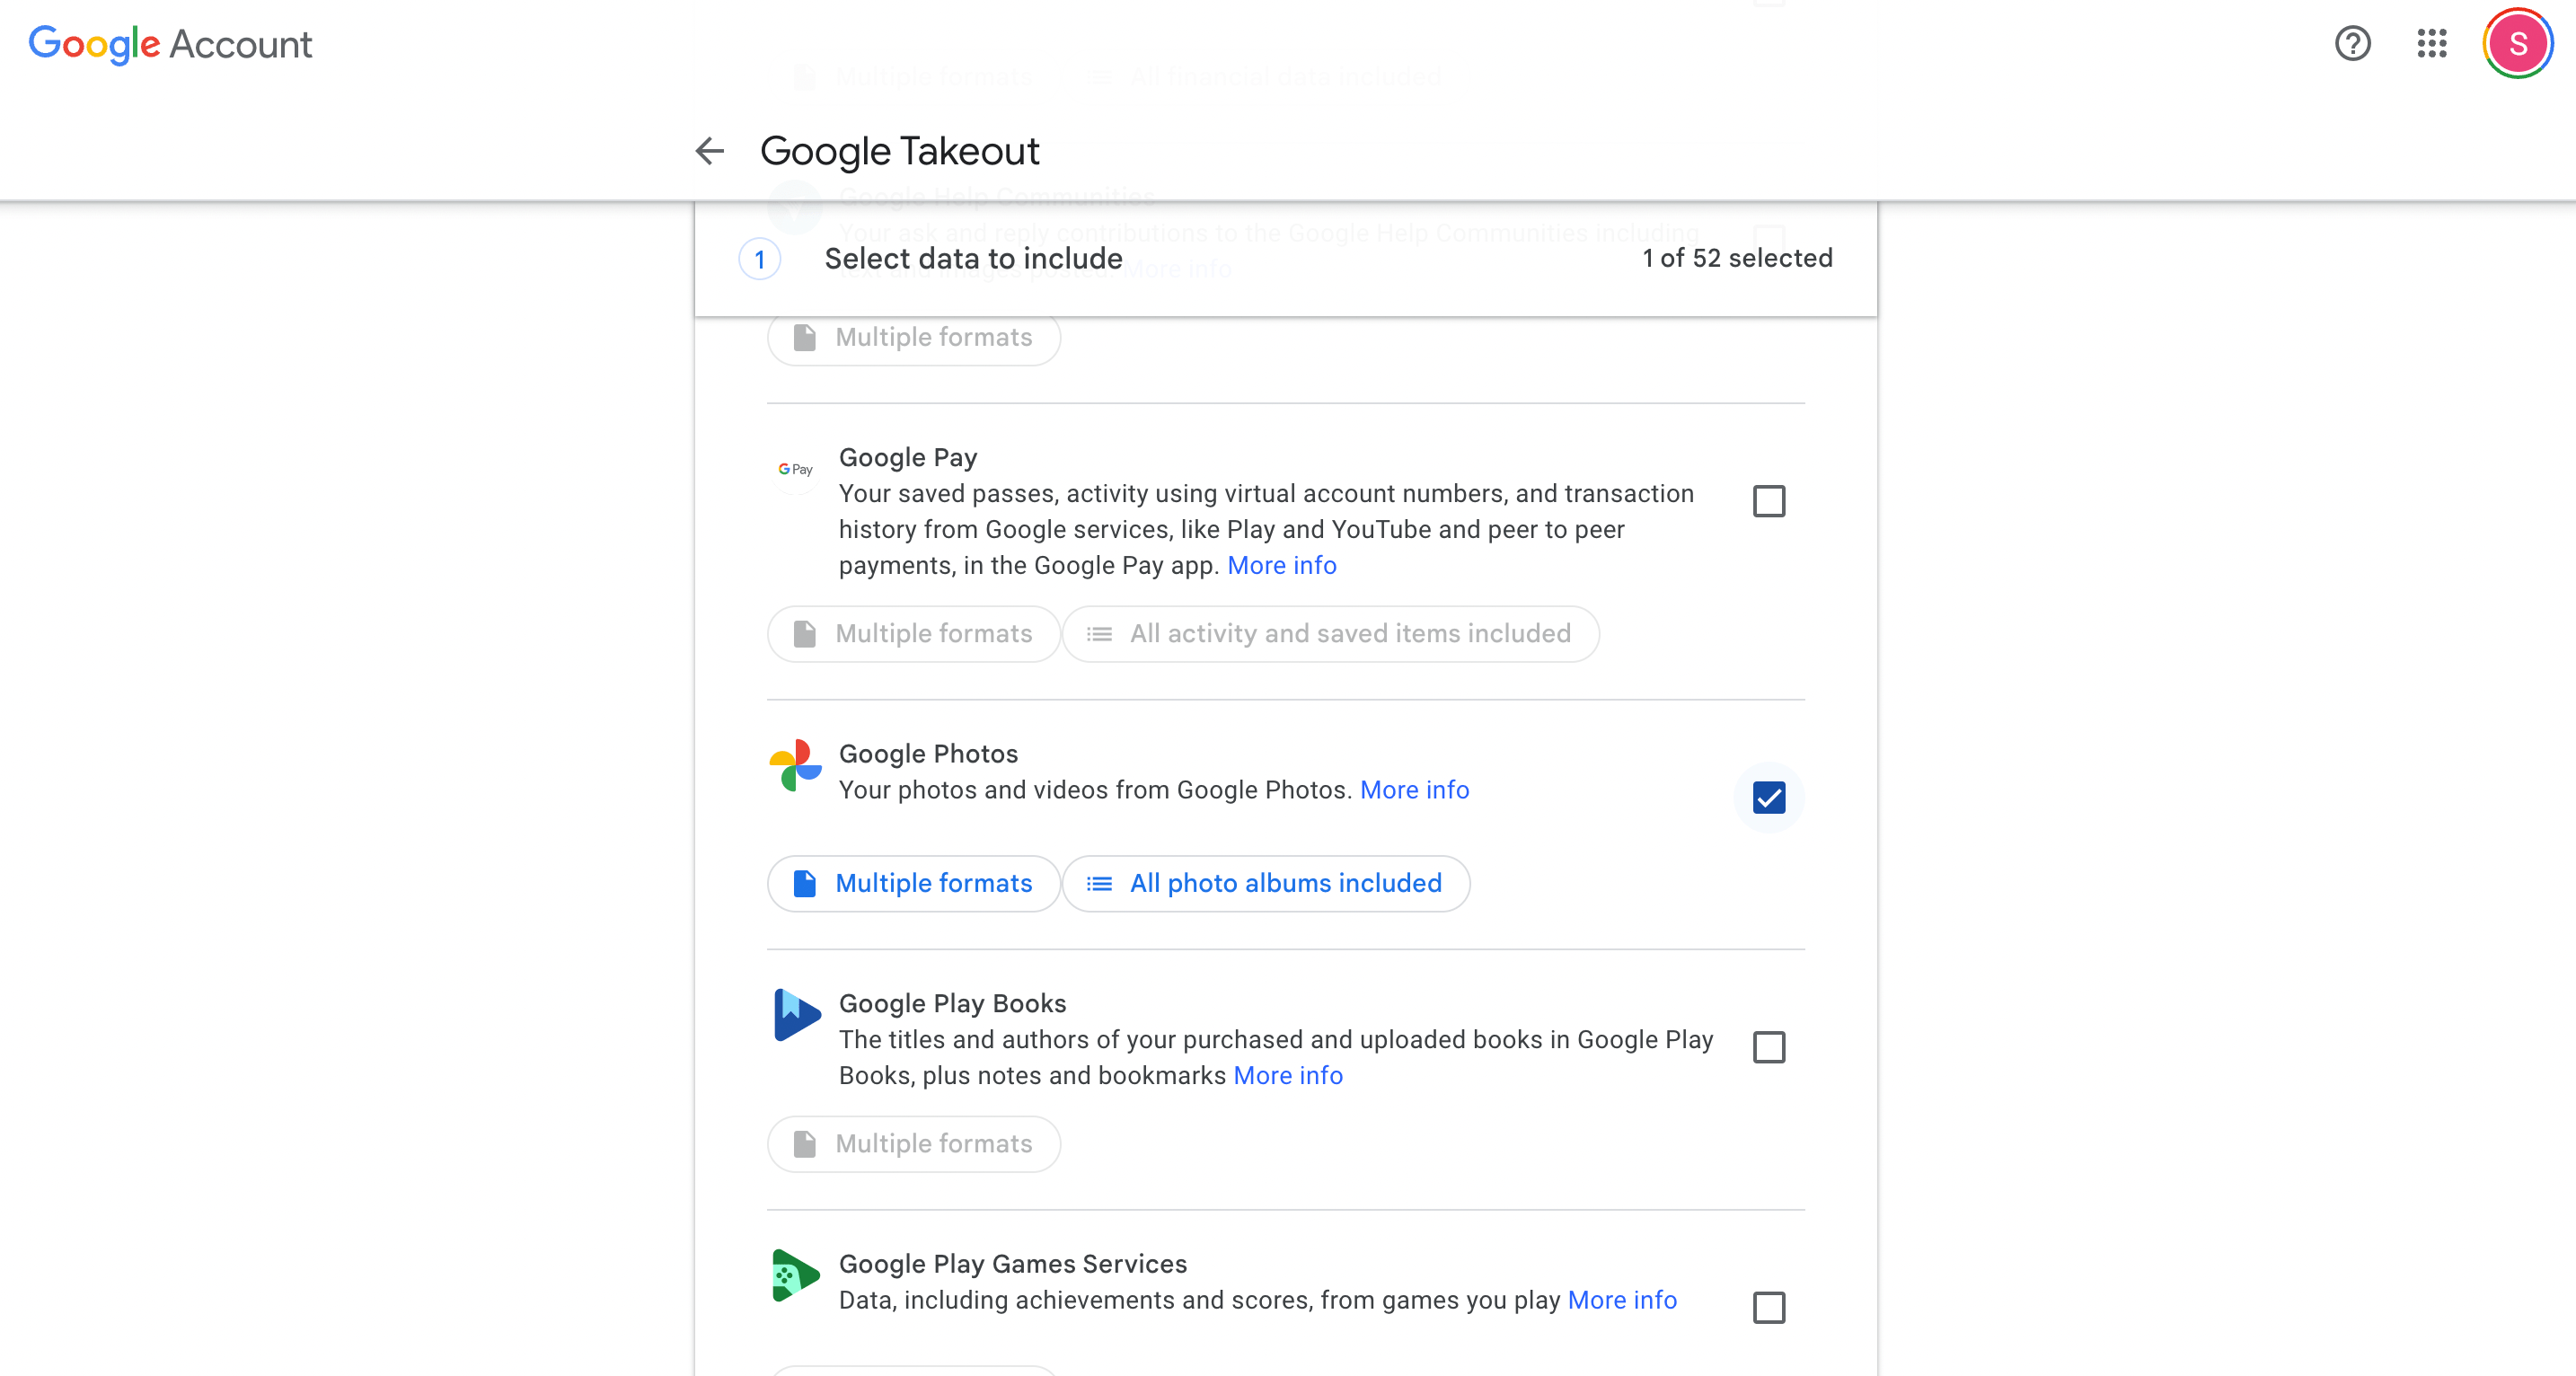
Choose the format (usually .zip), and start the export process.
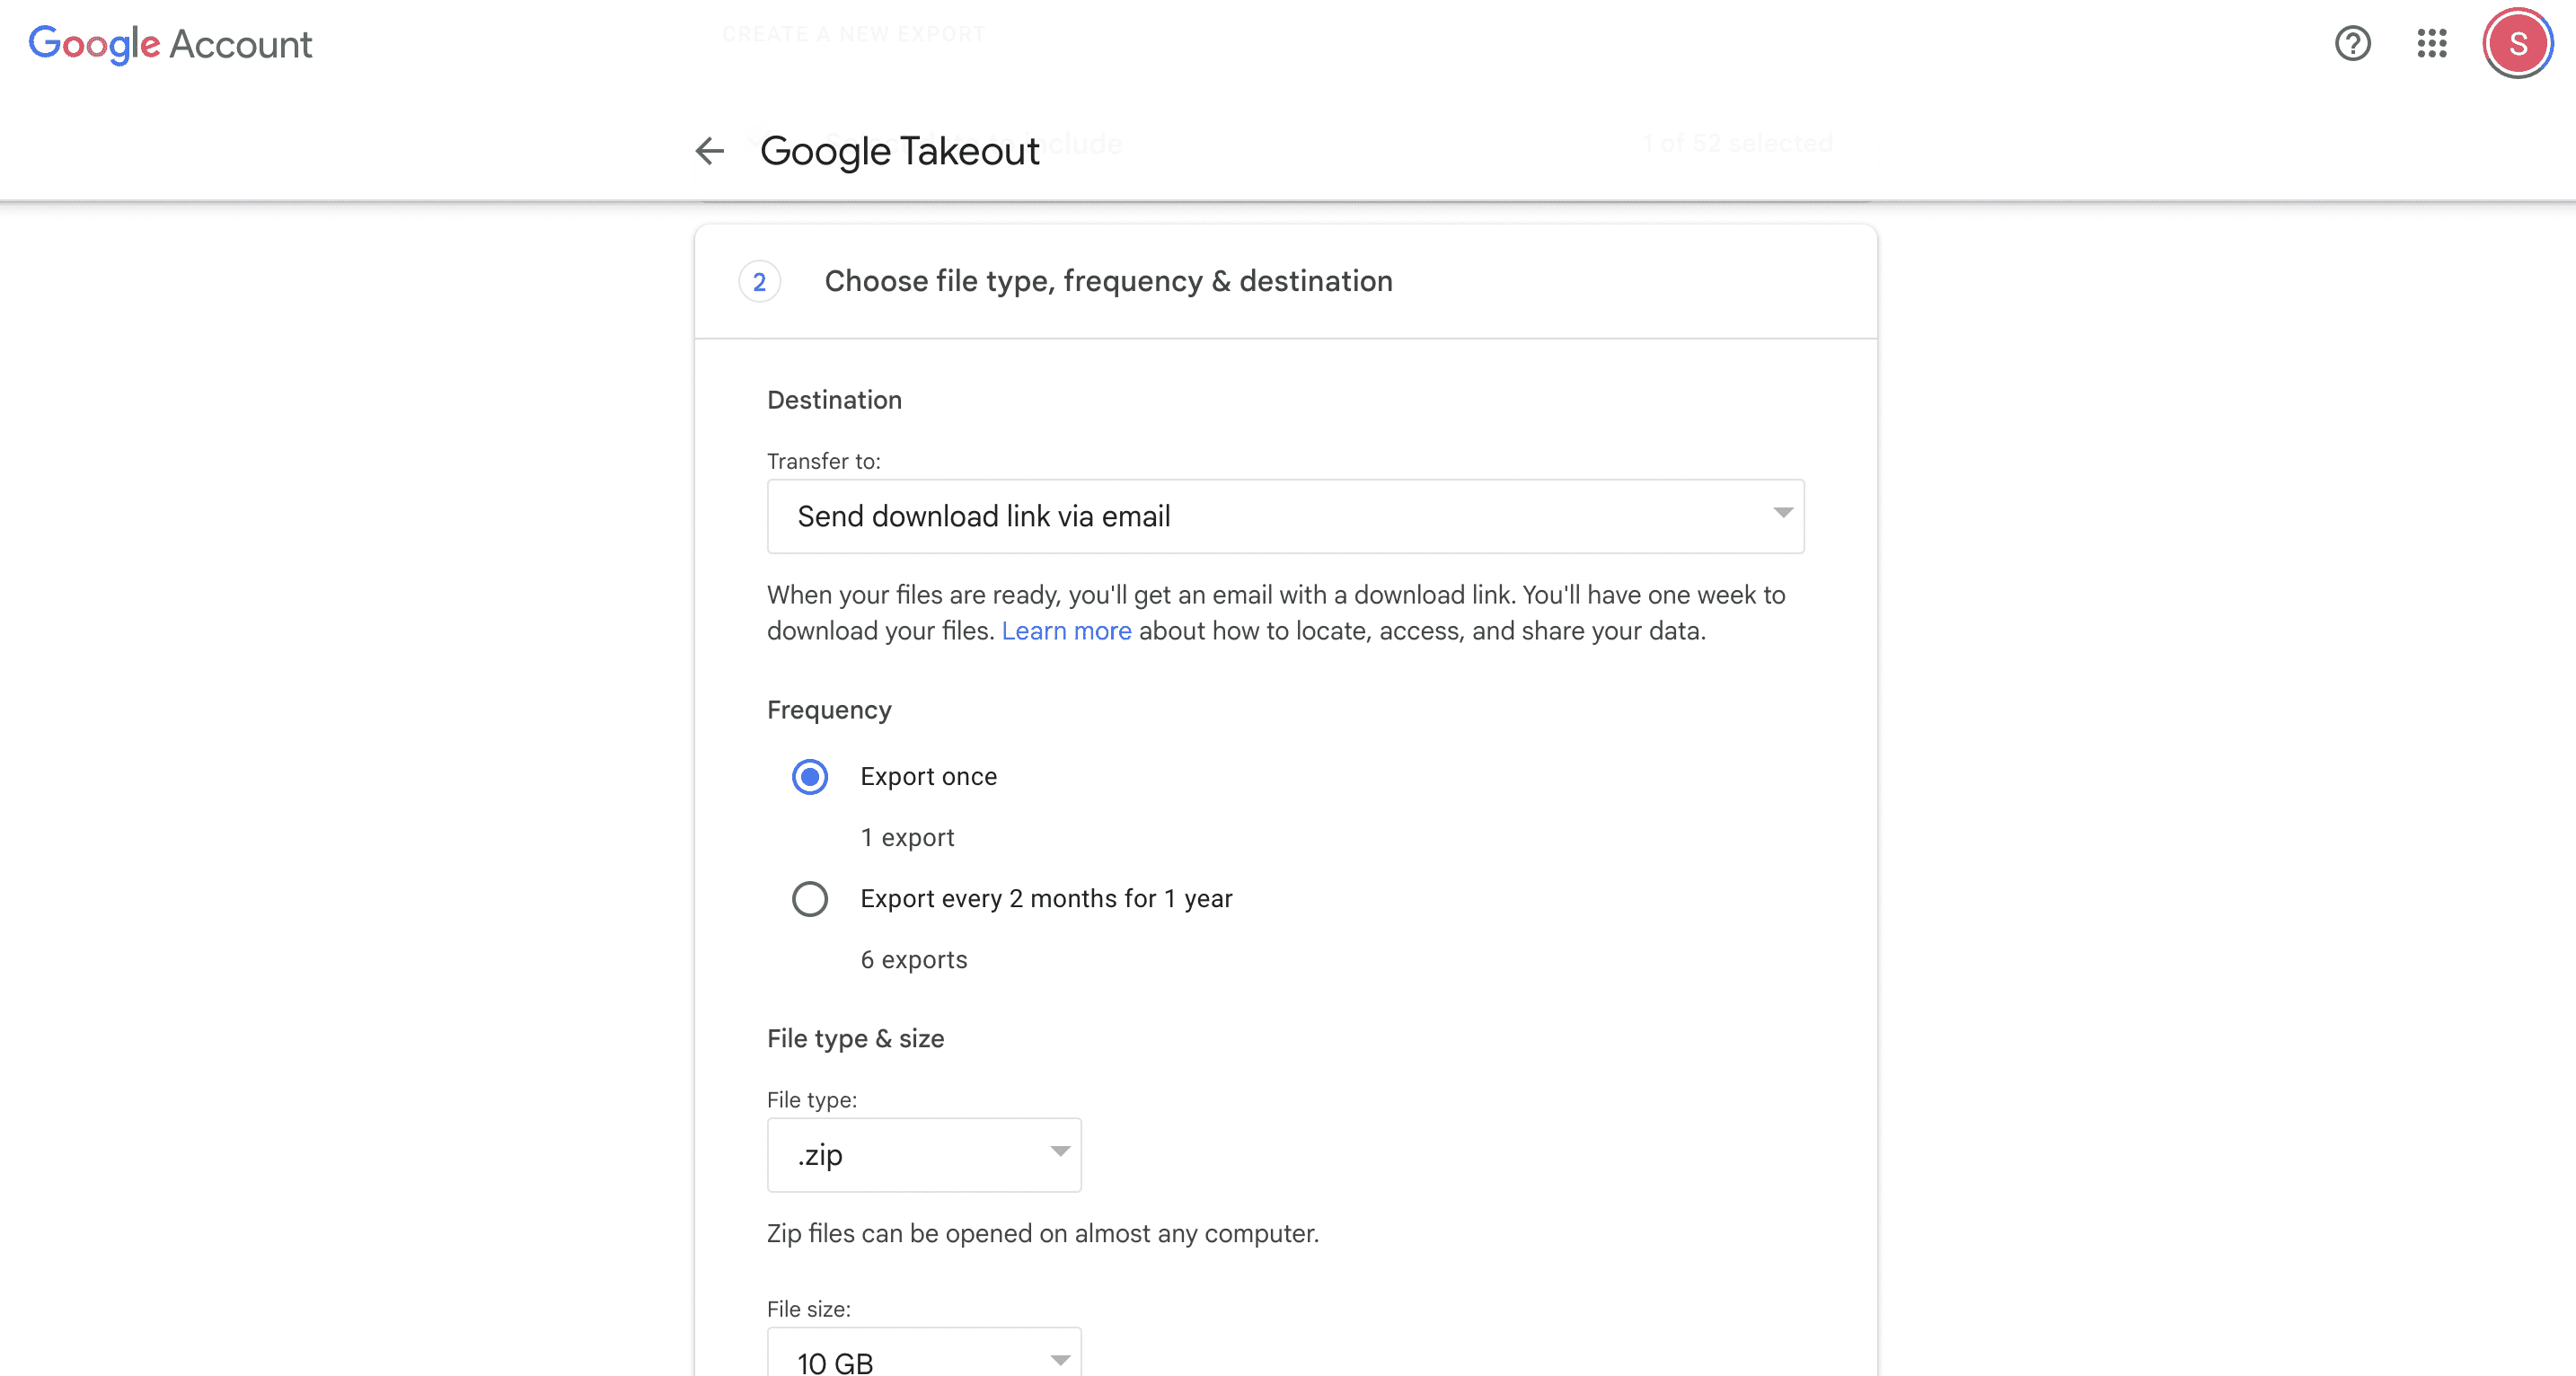
This process may take some time depending on the size of your photo library.
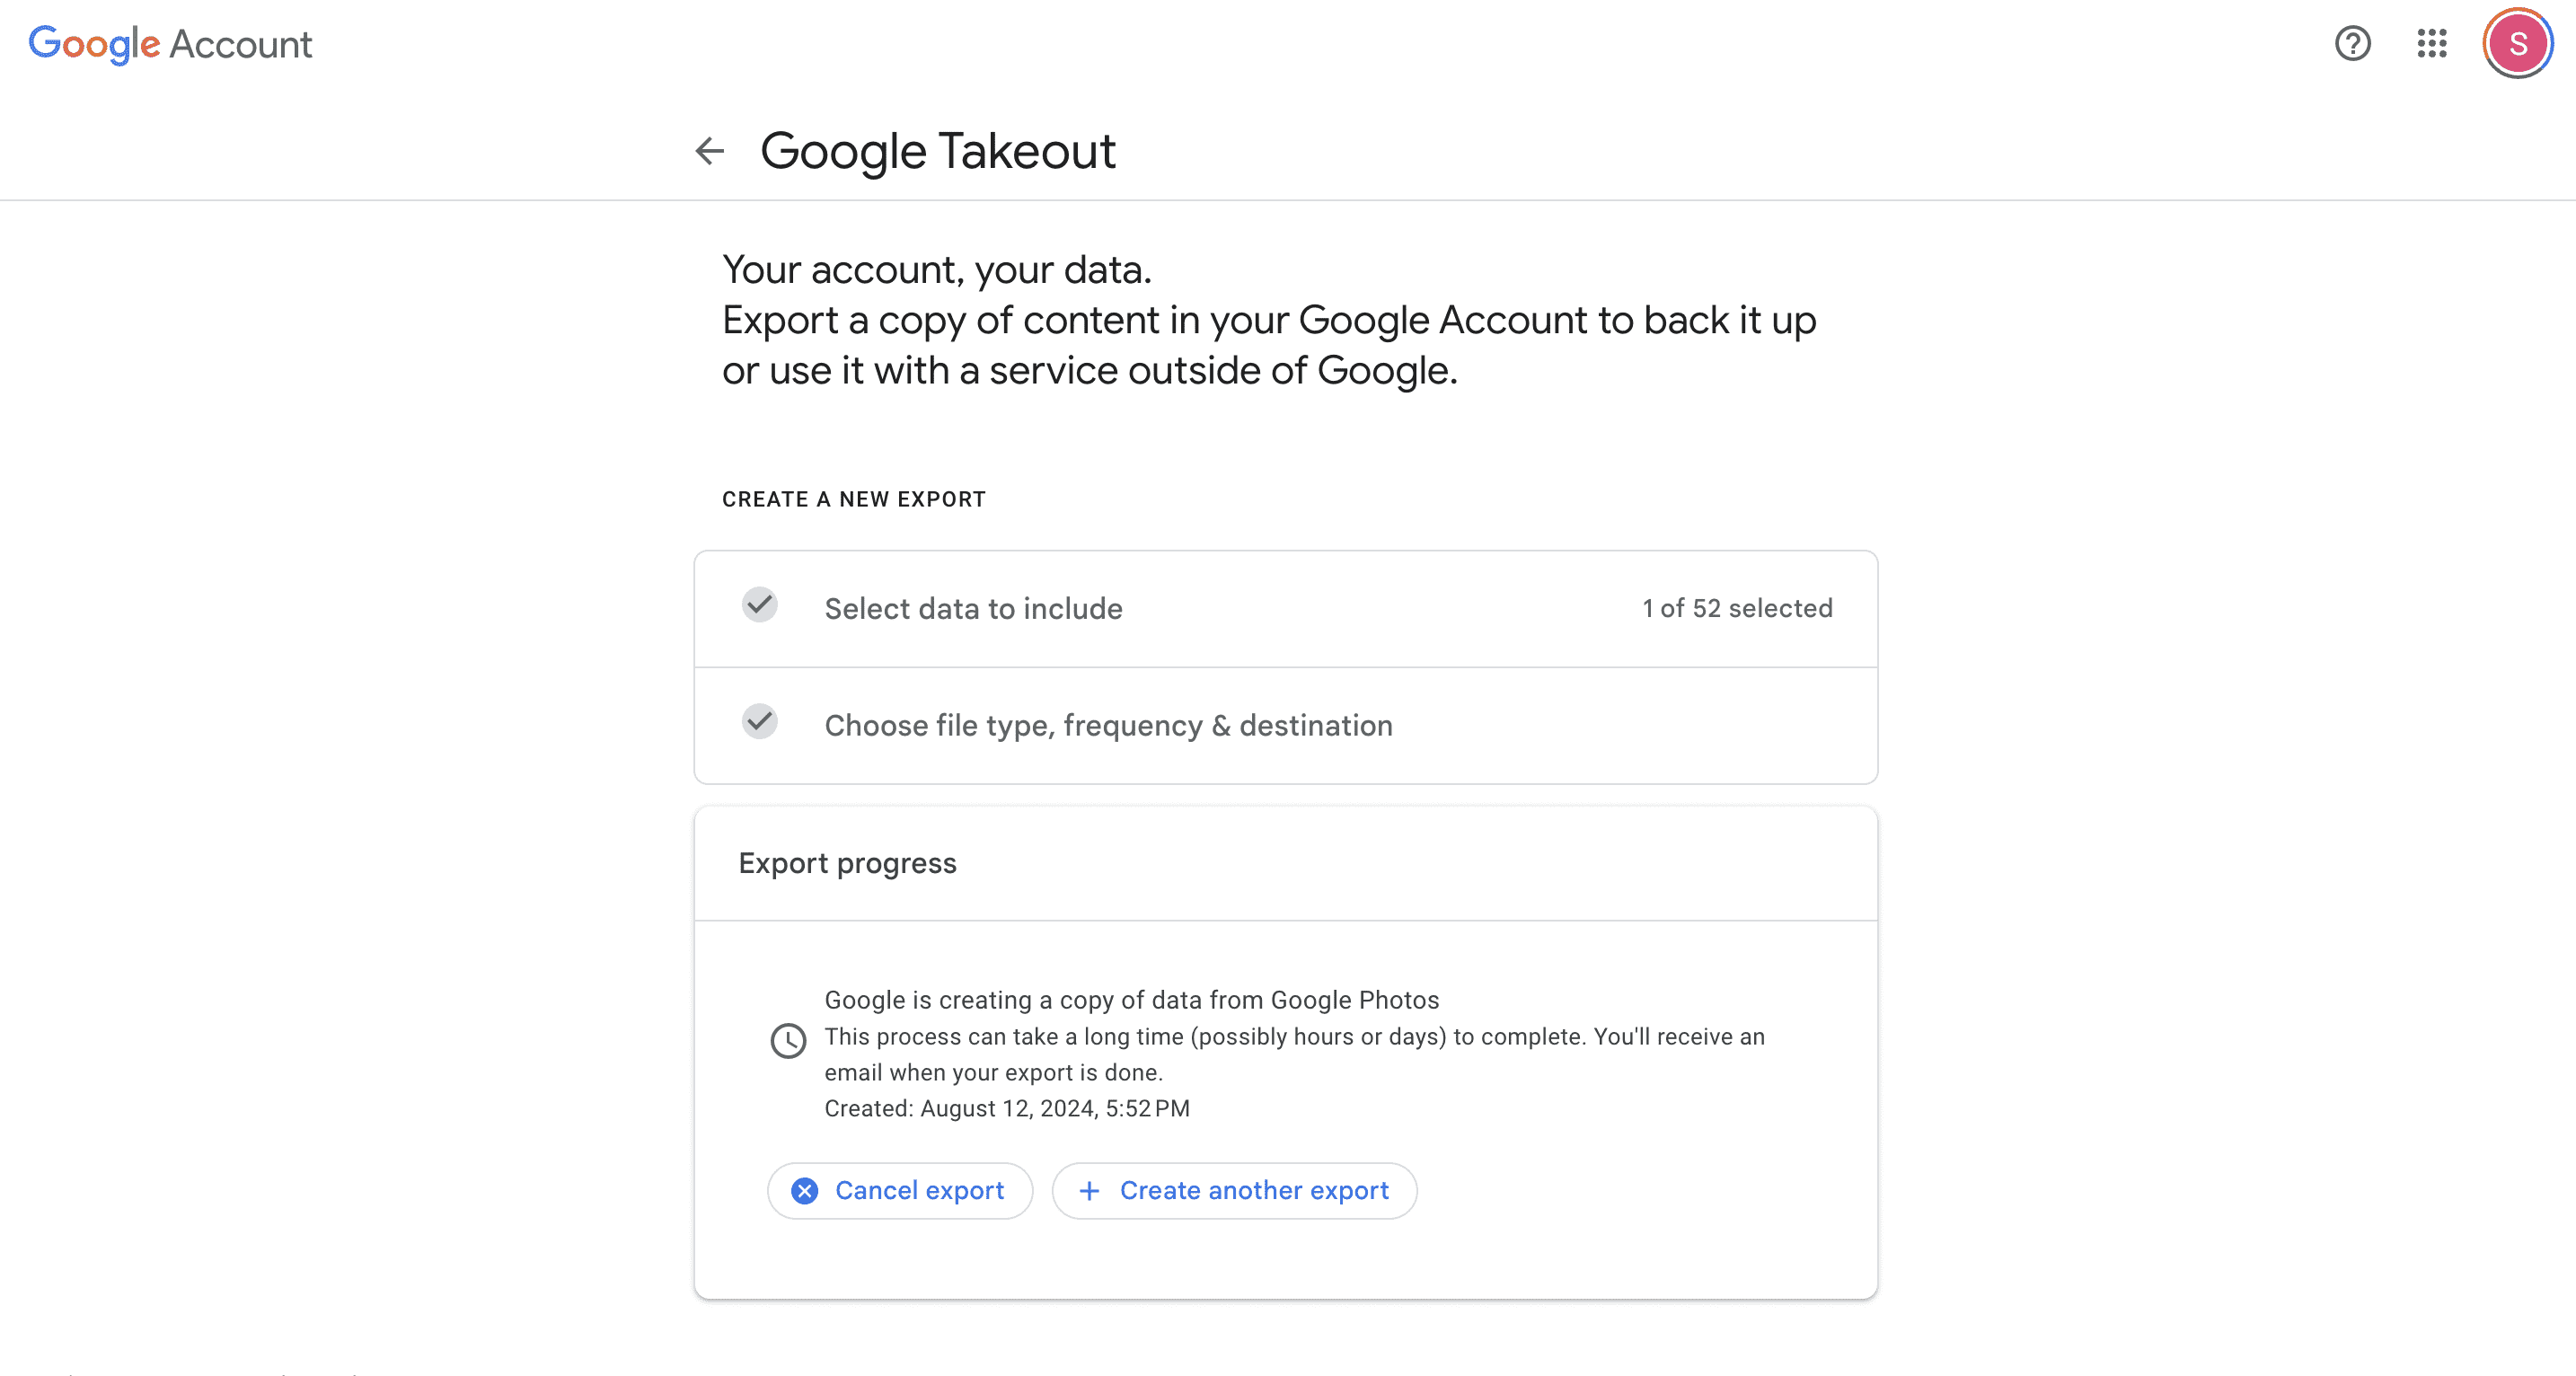
Download and Extract Photos: Once Google Takeout completes the export, you’ll receive a download link. Download the .zip file to your computer and extract its contents to a dedicated folder. You should now have all your Google Photos saved locally.
Upload Photos to iCloud: To upload your photos to iCloud, open a web browser and visit iCloud.com. Sign in with your Apple ID, navigate to the Photos section, and click on the upload icon (a cloud with an upward arrow). Select the photos you want to upload from the folder you extracted earlier, and iCloud will begin uploading them. Alternatively, if you have iCloud Drive installed on your Mac or PC, you can drag and drop the photos directly into the iCloud Photos folder.
Method 2: Using the Google Photos App on the iPhone
One of the simplest ways to transfer photos from Google to Apple is by using the Google Photos app directly on your iPhone. This method is ideal if you prefer a quick and straightforward process without involving a computer. Follow these steps:
- Download and Install Google Photos: If you haven’t already, download the Google Photos app from the App Store on your iPhone. Once installed, open the app and sign in with your Google account credentials.
- Select Photos to Download: Navigate to the photos you want to transfer. You can select individual photos or tap and hold them to select multiple images at once. After making your selection, tap the download icon (usually represented by a downward-facing arrow) to save these photos to your iPhone’s camera roll.
- Upload to iCloud: With your photos now saved to your iPhone, the next step is to upload them to iCloud. Open the Photos app on your iPhone, ensure you’re logged into your Apple ID, and navigate to the newly saved images. These photos should automatically upload to iCloud if iCloud Photos is enabled. To check, go to Settings > [Your Name] > iCloud > Photos and ensure the iCloud Photos toggle is turned on.
Managing Your Photos Post-Transfer
After successfully transferring your photos from Google to Apple, managing them efficiently to keep your digital life organized is important. Here are a few tips:
- Organize Your Photos: Once your photos are in iCloud, take the time to organize them into albums or folders. This will make it easier to find specific images later and can help you better utilize Apple’s powerful photo management features.
- Free Up Space on Google Photos: If you no longer need your photos on Google Photos, consider freeing up space by deleting them. However, ensure they are safely backed up in iCloud before doing so. You can also use Google’s “Free Up Space” feature to remove photos already backed up to Google Photos from your device.
- Regular Backups: Even though iCloud is a reliable backup service, having multiple backups of your important photos is always a good idea. Consider using an external hard drive or another cloud service to store additional copies of your most treasured memories.
Conclusion
Transferring your photos from Google to Apple is a crucial step when switching from Android to iPhone, ensuring all your memories are preserved and easily accessible on your new device. Whether you opt for the convenience of the Google Photos app or the comprehensive approach using Google Takeout and iCloud, the key is to choose the method that best suits your needs.
By following this guide, you can confidently transfer your photos, keeping your digital life organized and your memories secure. Now that your photos are safely stored in iCloud, you can fully enjoy the seamless integration and enhanced features that Apple offers. If you found this guide helpful, explore our other articles for more tech tips and tricks that make your digital transitions smooth and hassle-free.


